Introduction
TechNews is a extensive, professional-grade WordPress theme that offers a complete magazine portal website, with extra features such as animated review scores and in-article slideshows as well a Google Material Design-inspired layouts that highlight a range of articles and post types.
In this guide we'll cover installation of the theme, either via the automatic installation of the quickstart package, or manual installation in an existing WordPress installation so that your site will match the layout of our demo site.

Theme Structure
TechNews frontpage offers a complex yet customizable layout that can display a range of different posts from a variety of categories for dynamic, diverse content delivery. This content is generated via a combination of a page-based layout with shortcodes, custom code that pulls specific articles by tag or category, and use of our powerful, open-source widgets including GK News Show Pro and GK Tabs. By using this solution combination admins will find that initial setup of the theme is slightly more time-consuming than our more recent, entirely-page-based themes, but these solutions also offer greater customization options to control which of your content is served to the frontpage.
Like our most recent themes, the core of the frontpage relies on a page-based layout; a static frontpage is set that uses a special page template called Frontpage, and subpages of this base page create additional frontpage sections. However, unlike our recent releases, in this case the page-based layout creates only some of the frontpage areas, whilst the others are automatically generated without user input or created via widgets.
The frontpage can broadly be split into six sections; the header, the "What's New" section which lists latest posts across all categories, The "Reviews" section that contains clickable review listings and animated ratings, a "Videos" section that links to posts with videos and allows users to play the videos in a lightbox on the frontpage, a most-commented, trending and highest-rated listing section, and finally, a simple banner advertisement area. Let's breakdown how each of these sections are created:
- Header - The header contains a customizable grid-based layout that displays your featured posts. The header relies on the base Frontpage for its creation; once a base page is created and the Frontpage template assigned the header will be automatically generated. However, the settings for the header are all controlled via the WordPress Customizer rather than any content in the base frontpage.
- What's New Section - This section displays a list of latest posts in a vertical or horizontal post layout (user-switchable via a button on the live site). Like the header, this section relies on there being a static frontpage set that uses the Frontpage template, but no settings are actually taken from the base page; instead, this section automatically pulls and previews your latest posts from all or selected categories, which is set in the WordPress Customizer.
- Reviews Section - This section displays previews of your latest reviews and their respective scores. This section's content is created via a shortcode in the body of the first subpage of the Frontpage that creates an instance of the News Show Pro widget.
- Videos - This section displays highlights of your video posts, and users can choose to navigate directly to the article from the frontpage, or stay on the frontpage and open the video within in a lightbox popup. The content here is created using a News Show Pro shortcode in the second subpage of the Frontpage.
- Most Commented/Rated Section - In this section there are three separate ranked listings; two tabs containing a most commented and trending listing, and a third separate most rated listing. These sections are created using widgets only, specifically a combination of GK Tabs to create the tabs, and News Show Pro to create the listings.
- Banner Advertisement - This simple banner advertisement section is created using a plain text widget and some basic HTML code; much simpler that the other areas of the frontpage!
Installing the TechNews Template
The most important decision to make before proceeding with your installation is whether you need to install the theme manually, or if you can use the Quickstart package, which will install everything for you.
Which installation method you should use depends on the current status of your site. The Quickstart is a full installation of WordPress that installs WordPress itself, the theme, plugins, demo content and database data to match our demo layout. However, as this is a full WordPress installation it may only be used on a clean server; the package cannot be installed in an existing WordPress installation.
Manual installation is still simple as WordPress includes the ability to import much of the content from the demo, but since TechNews is quite a complex theme that uses widgets to provide many of its functions there will be additional steps that add a little bit of time to installation compared to the quickstart, such as installing the plugins and placing and configuring the widgets, but if you've got a lot of content that will take you a long time to backup, or if backing up and restoring your content is not an option, then the manual installation is the way to go.
Generally we recommend the quickstart installation whenever possible; this install method provides you with the exact settings and layout needed to match the demo so you can start customizing your site right away. You should use this method if you are starting a new website, or if your existing website/WordPress installation lacks any unique content you wish to preserve. For example, if your host installed WordPress for you, then it's advisable to remove this installation and reinstall using the quickstart, as it is much faster than manual installation.
If you have a lot of existing posts or other content that you do not wish to lose then the manual installation is the only way to install the theme and match the demo layout without losing this content. However, with manual installation you will be able to take care of some customization as you go; modifying shortcodes or widget settings to match your own content rather than the imported demo content.
Both installation methods will be covered in the following sections, with step-by-step guides to getting everything up and running.
Quickstart Installation
The quickstart installation requires very little input save for your admin and database details, and once the quickstart is uploaded to your server the entire install process takes just a few minutes. In order to complete this install method you will need FTP access to your server and a database name, username and password. A complete step-by-step guide with further information on the requirements may be found in our documentation:
Manual Installation
Manual installation requires that the theme and plugins are manually installed, then the demo content imported and elements such as menus and widgets are placed and configured according to our demo settings. Many of these steps are fairly automated, so a manual installation won't take much longer than the standard quickstart install, but there will be additional steps.
Broadly-speaking, manual installation can be split into several steps:
- Download and install the theme.
- Download and install plugins.
- Import theme demo content.
- Assign Static Frontpage.
- Place and configure widgets.
- Setup menus and additional pages.
Let's look more closely at each step in turn; once done, you will have a nice layout that matches the demo, ready for your own content!
Preparing Your Site for Manual Install
Before starting the installation, you'll want to ensure that the install process will complete without a hitch. For this reason, it's important to move any existing widgets you have previously placed in any widget position in your Appearance → Widgets section are moved to the Inactive Widgets section, or deleted entirely if you no longer wish to use them; this will leave you with no active widgets in any widget positions.

This step is necessary as, barring some common sections, the widget areas where your widgets are placed are exclusive to the theme; if you move from one theme to another the widgets will often be moved to a new widget area which can damage the overall theme aesthetic. For example, your current theme may only have a single widget position where all widgets are assigned, such as the sidebar. However, your new theme may have several widget positions depending on the complexity, such as header areas, banners, multiple sidebars and more. Once the theme is installed and activated, the widgets from your old theme may be inadvertently assigned to the first position of the new theme, which may not coincide with your older layout and will make your new theme look rather messy until the widgets are removed/reassigned.
Download and Install the Theme
Now that you're ready to install, the first thing to do is download and install the theme's zip package. Click on the following link to go to the TechNews Download Page (you must be logged-in to do so!). You'll see that there are three different files available:
- gk_technews.zip - This package contains the basic theme files; you should download this package for manual installation.
- gk_technews_quickstart.zip - This contains the quickstart files for a new installation of WordPress that matches the demo layout exactly; this can be ignored if you are installing manually.
- gk_technews_rest_files.zip - This package contains the source PSD files for the theme; you shouldn't need these unless you intend to make some fundamental changes to the core design of the theme so this package can be ignored.
Download only the basic theme package. Once done, you can move on to theme installation by following this steps:
- Login to your WordPress backend and click on Appearance → Themes in the left menu to be taken to the Themes section of WordPress.

- Click on the blue Add New link at the top of the screen to open the Add Themes page.

- Click on the blue Upload Theme link, located at the top of the screen as with the previous step.
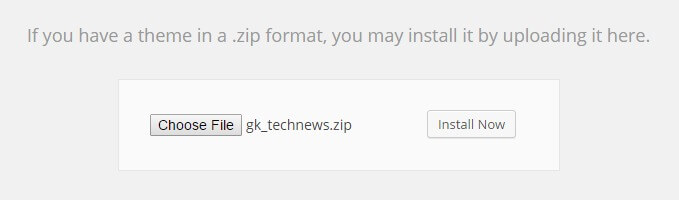
- A dialogue box will open to allow you to select the theme package for upload. Click on the Choose File button and select your just-downloaded gk_technews.zip file. Then, click the Install Now button to start the installation process.
- Wait a few moments whilst WordPress installs the theme's files. Once the install is complete, you will be given three options; Live Preview, Activate, or Return to Themes Page.
Click on Activate.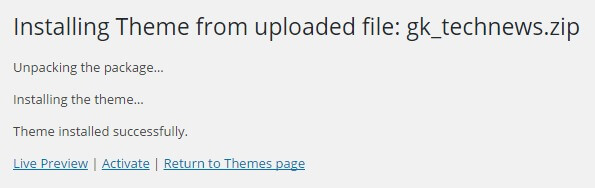
The theme is now installed and ready to go; next we need to take care of installing the plugins.
Installing Plugins
Plugins are a great way to expand your WordPress installation's capabilities, and in TechNews we use our own custom plugins to create a variety of post showcases, tabbed sections and more. In TechNews there are three required plugins that are needed to provide the core features of the theme, and one third-party plugin, MailPoet, that is used to provide the newsletter functionality in the theme. The required plugins can be installed automatically after theme installation, but MailPoet will need to be downloaded and installed separately, which we'll cover at the end of this section. The included plugins are:
- News Show Pro - This plugin creates article previews and showcases. With full control over whether to show featured images, titles and text snippets with multiple display options and pagination. This widget is the core of the frontpage layout, and is delivered via shortcodes in the page-based frontpage sections, and via widgets for the other sections.
- Tabs - This widget creates tabbed areas that can then display other widgets; you can see it used on the frontpage to create the Most Rated and Most Commented tabs, which in turn display instances of the News Show Pro widget above.
- Widget Rules gives you control over which pages and posts a widget should appear on, so you can create specific widget instances to match all types of content. This is used to, for example, display the frontpage widgets on the frontpage only.
Though these plugins are not included with the theme files, they may be installed with very little effort after theme installation by following these steps:
- After installing and activating the theme a message will appear at the top of the WordPress backend that tells you which recommended or required plugins the theme uses.

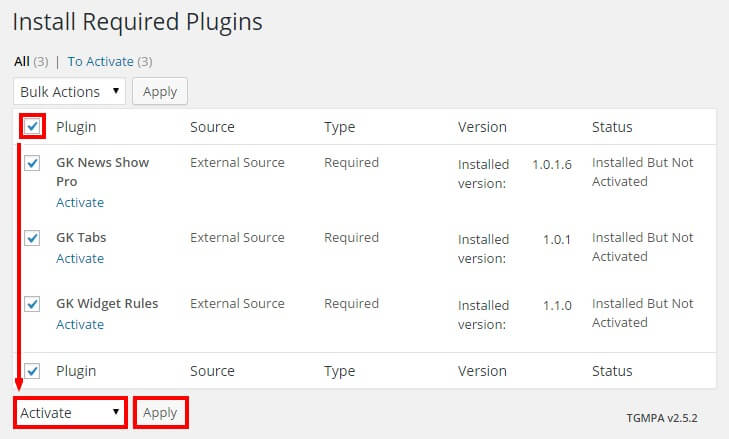
- Click on the Begin Installing Plugins text link that appears underneath the message; you will be taken to the Install Required Plugins screen.
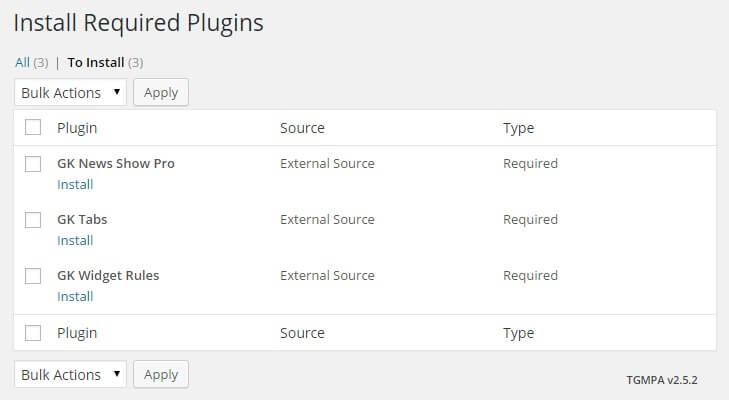
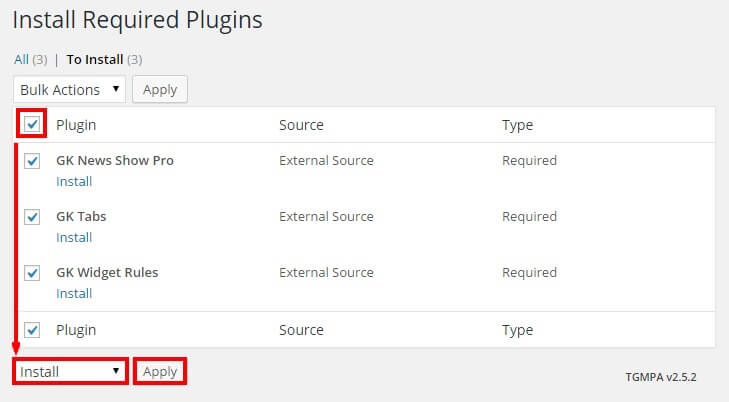
- On this screen there is a list of the recommended and/or required plugins; to the left of the Plugin title is a tickbox; click on this to add a tick to every plugin. Then, click on the Bulk Actions drop-down list and select Install, then click Apply.
- Allow WordPress to run through the installation process for each plugin; you will see messages advising of each step of installation. Once it finishes, you will see a text link called Return to Required Plugins Installer; click on this link.

- Now that the plugins are installed, all that's left is to activate them. Like before, click on the tickbox next to the Plugin title to add a tick to every plugin, then select Activate in the Bulk Actions drop-down list and click Apply.
With the core plugins installed we can now install the only third-party plugin used in TechNews; MailPoet.
Installing MailPoet
MailPoet is a complete newsletter solution for WordPress, allowing for the creation of custom sign-up forms, subscriber lists, and newsletters. In the TechNews demo layout the MailPoet subscription form is used to create the newsletter popup that appears at the bottom-right of the screen by default. This plugin is available via the WordPress Plugin Repository, so it takes only a few seconds to install.
First, log-in to your WordPress dashboard and click on Plugins → Add New option in the main menu to be taken to the Add Plugins screen. At the top-right of this screen is a Search bar; in this field search for MailPoet; the top search result should be the MailPoet Newsletters plugin by MailPoet.
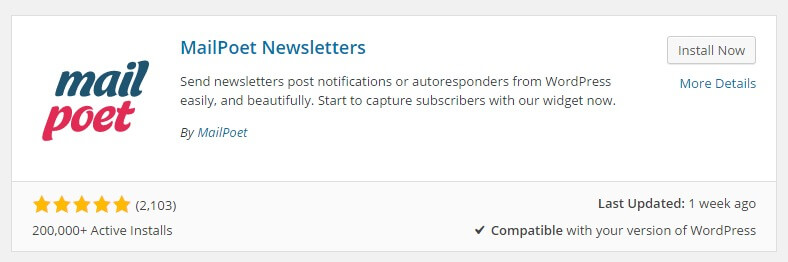
Click on the Install Now button to begin the download and install process. Once it finishes, you'll be given two options; Activate Plugin or Return to Plugin Installer. Click on Activate Plugin; after a moment the plugin is activated and you are returned to the Plugins page, and the plugin is ready to use! Now you can move on to importing the demo content.
Importing the Demo Content
This step will import all of the articles, categories and menus from our demo layout, including the pages needed to create part of the frontpage. Importing requires two steps; first we need to install the tool that will let us import the demo content, the WordPress Importer. Then, we need to download the demo content and use the WordPress Importer to import it to our site.
Installing the WordPress Importer
The Import/Export option exists in the WordPress backend even in a new installation, but the core plugin that hands the process is not included with the WordPress core, so it must be installed if you haven't done this already. To do so, follow these steps:
- Log-in to your WordPress backend and click on Tools → Import in the left menu. A new screen will open with a list of options for systems that you can import posts into WordPress from, including Tumblr, LiveJournal and more.
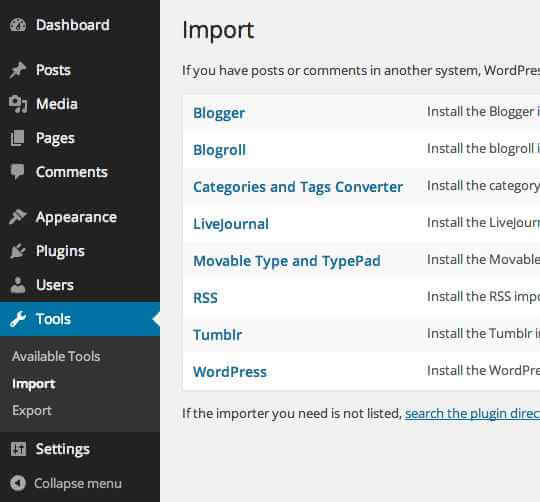
- The demo content we will be importing comes from a WordPress installation, so click on WordPress in the list of systems. A pop-up will open with an option to install the WordPress Importer.
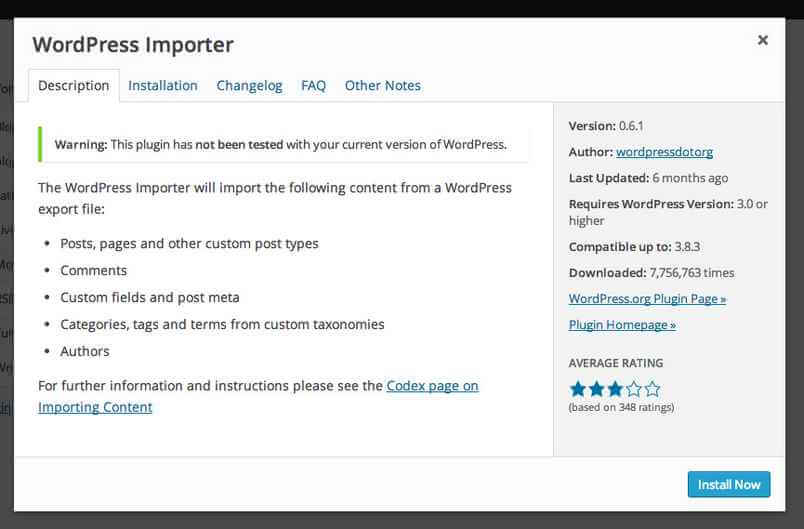
- If you want a bit more information on what can be imported, take a moment to read through the description. Once done, or if you don't fancy reading, you can click the Install Now button to start the installation process.
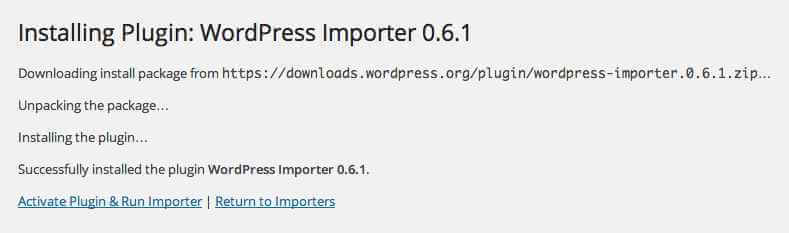
- WordPress will run through the download and install process automatically, so relax for a moment and let it do its thing. Once the install is complete you will see a message and two text options that let you activate and run the newly-installed plugin, or go back to the list of system importers. We'll be importing our WordPress content soon, so click on Activate Plugin & Run Importer.
After a moment you will be taken to the Importer's start screen, ready for a file to be uploaded. However, we don't yet have the file to upload; we'll take care of that now.
Downloading and Importing the Content
All the demo content data is contained in what WordPress calls a WXR file, though it is more commonly called an XML file. We'll need to download this file and use the WordPress Importer to install it on our site.
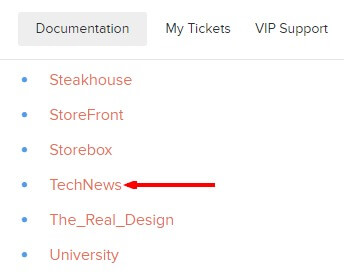
The list of available XML files for our themes may be found on this theme documentation page; you will see a list of links, each pointing to a theme's XML file; simply find your chosen style in the list.
If you just click on the link for the TechNews WXR file you might encounter an issue; instead of downloading, your browser will instead open and display the file contents automatically. To get around this, we'll need to tell the browser that we want to download, rather than display the file:
- In Safari - Right or control-click on the link and select ‘Download linked file’. This will download a file called Technews.xml.
- In Chrome - Right-click on the link and select ‘Download link as…’. A dialogue box will open to specify where the download should be saved. The name will default to ‘Technews.xml’, so just leave this as default and save the file.
- In Firefox - Right-click on the link and select ‘Save link as…’. A dialogue box will open where you can specify the save location; as with the other browsers the name will default to 'Technews.xml' so leave this as it is.
- In Internet Explorer - Right-click on the link and choose 'Save Target as'. A dialogue box will open so you can decide where to download the file to. The file name will default to 'Technews.xml', so leave this as it is.
Now with the file downloaded we can import the content into WordPress:
- Navigate back to your WordPress backend and open the WordPress Importer by clicking on Tools → Import → WordPress; if the importer is still open after the install then you may obviously skip this step!
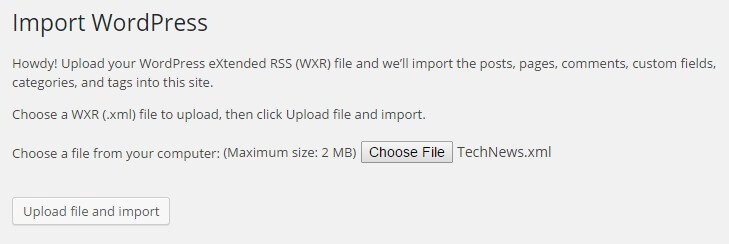
- Click on Choose File and select the 'Technews.xml' file you just downloaded, then click on the Upload file and import button.
- After a few moments you will see the Assign Authors page. This area will let you decide who gets to be in charge of the content you are importing; you may import the original authors, create a new author, or assign the content to your existing users. There may only be one or two authors who may be imported, or there may be as many as ten, especially if the theme includes BuddyPress since each BuddyPress user in the demo content will be considered a separate author. One of the following options will need to be set for each author and their content that is to be imported:
- If the option is left blank - The original creator's username will be imported into your WordPress, and the imported content assigned to the imported username.
- If a name is entered in the 'Create new user with login name' field - The name you wrote in the field will be used as the username for a new user, and the imported content will be assigned to this new user.
- If a user is selected in the 'Assign posts to an existing user' drop-down list - Once the content is imported it will be assigned to the user that you selected in the drop-down box.
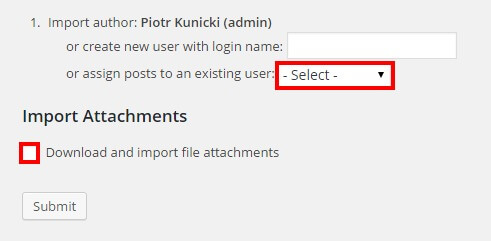
- Now click on the Download and import file attachments tick-box; if selected then the demo placeholder images and other media from the demo will be imported along with the posts.
- Finally, click on the Submit button to start the importing process. Wait for the process to complete; once done, you will see a confirmation message letting you know everything is finished.
The demo content is now ready to go; now it's time to start on preparing your frontpage. We'll need to take care of three steps; first, assigning a static frontpage, which will create the first four sections of the frontpage from the header to the video section. Second, placing and configuring the widgets that create the tabbed listings and banner advertisement section at the bottom of the frontpage, and finally, assigning the menus so users can navigate around the content.
Assigning the Static Frontpage
TechNews uses a partially page-based design; the majority of the frontpage elements are created using shortcodes and custom HTML taken from pages. A core frontpage template is assigned, and subpages of the base page provide each section's shortcode and HTML. Since we've imported the demo content in the last section, we now have a set of ready-prepared content for our frontpage that we can apply simply by assigning the imported frontpage as our static frontpage. To do so, first open the WordPress Customizer by clicking on Appearance → Customization in your WordPress backend.
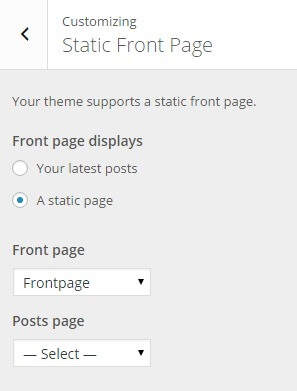
Now click on the Static Front Page section to open its options. You'll see two radial buttons that let you use your Latest Posts as your frontpage, or a Static Front Page. Make sure the Static Front Page radial button is checked. Now, in the Front Page drop-down list, find the page called Frontpage and click on it.
Once done, click on the blue Save button at the top of the customizer to save changes; the static frontpage is now set, and your frontpage will now be looking quite a lot like the demo! There are some elements missing though; the listings and banner advertising area at the bottom of the page are created separately from the page content using widgets rather than shortcodes, so we'll need to manually install and configure these elements.
Frontpage Widgets
Unlike our other recent themes, the lower areas of TechNews' frontpage that contains the article top-ten lists are created using widgets rather than page-based shortcodes. This allows for greater flexibility in terms of content, but since these widgets can't be imported in a standard WordPress installation like the page content can, so it's necessary to manually place and configure these additional frontpage elements. However, this process is very simple, and since we already have the demo posts and categories matching the demo layout won't take very long. Let's go through each widget installation in turn.
The Most Commented Listing
The Most Commented listing displays a selection of your articles in a list format:
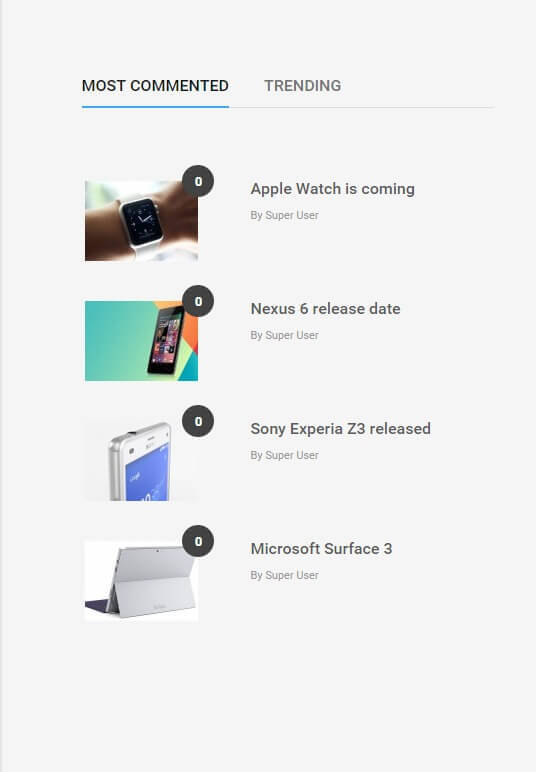
Usually when adding widgets we will use the WordPress Customizer, but in this case we will add the instance of News Show Pro into a special GK Tabs widget area, which can then be displayed by our GK Tabs widget in the appropriate frontpage position. As the special tab areas are specific to the GK Tabs widget we will need to set it up via the standard Widgets page because these special widget areas do not appear in the customizer. To create this section, open the Widgets area of your WordPress backend by clicking on Appearance → Widgets in the main Dashboard menu. Here you'll see a list of available widgets on the left side of the screen, and a list of the available widget areas.
Click on the small down-arrow next to the GK Tabs I widget area title on the right-hand side of the widgets page to expand the section, then click and drag an instance of the News Show Pro by GavickPro widget into the tabs area; this will create a new NSP widget and expand the options ready for you to amend. There are many options available in this widget, but don't worry as only some of them need to be changed from the default. To make configuring the widget easy screenshots of the demo configuration for each option tab in the widget are added below, along with written details as to which options need to be changed from the default setting.
The Basic Settings Tab
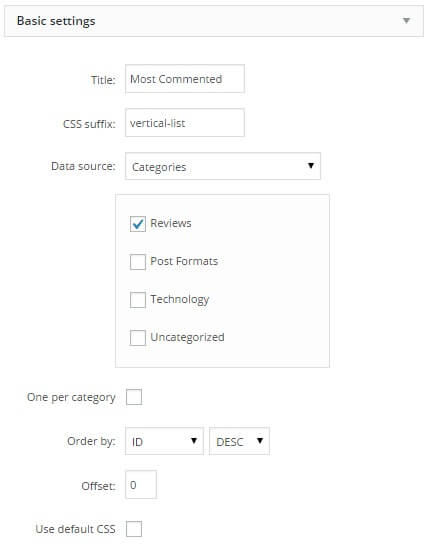
- Set the Title to "Most Commented".
-
Add the following text to the CSS Suffix field:
vertical-list - Change the Data Source option to Categories and add a checkmark to the Reviews category in the list.
- Uncheck the Use default CSS option.
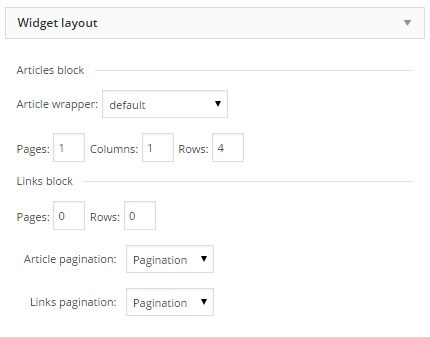
The Widget Layout Tab
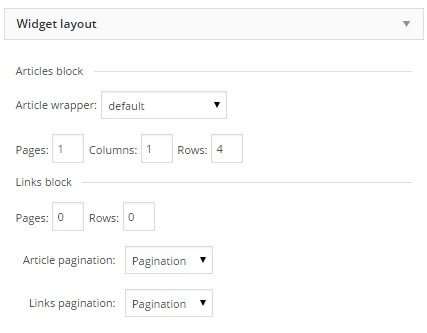
- Set the Rows option to 4.
The Autoanimation Tab
No changes are required for this tab.
The Article Layout Tab
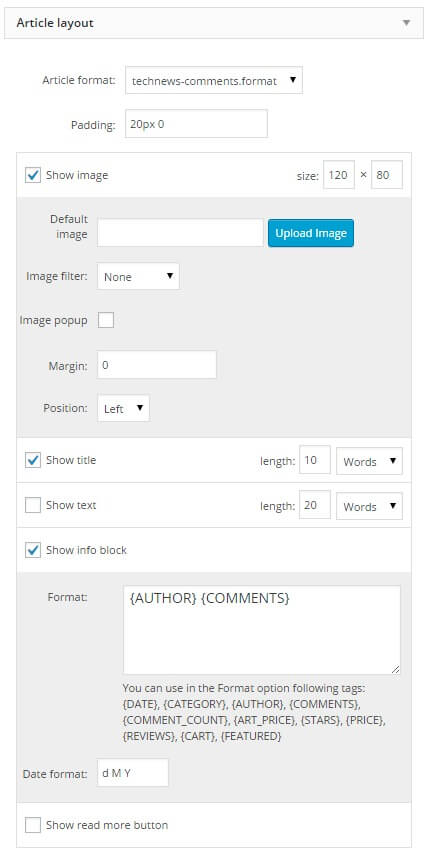
- Set the Article format option to technews-comments.format.
- Using draq & drop, put the elements in the following order; Image, Title, Text, Info Block (see screenshot for the order items should be in when finished).
- Set image size to 120x80.
- Uncheck the Image Popup option.
- Set the image's Position setting to Left.
- Uncheck the Show Text option.
-
In the Show Info Block area, set the Format option to:
{AUTHOR} {COMMENTS} - Uncheck the Show Read More option.
The Link Format Tab
No changes are required for this tab.
The Advanced Settings Tab
No changes are required for this tab.
All options are now set, so click on the Save button at the bottom of the widget to save changes.
The Trending Listing
Like the Most Commented listing, this displays a selection of your articles in a list format:
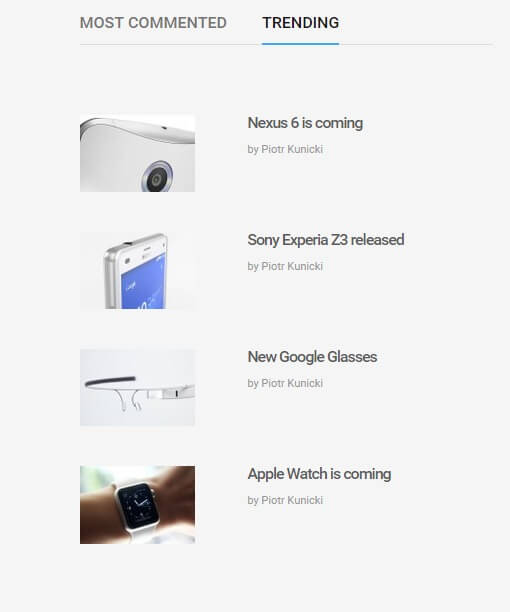
Now we can create the second tab's content; open the Widgets area of your WordPress backend by clicking on Appearance → Widgets in the main Dashboard menu. Here you'll see a list of available widgets on the left side of the screen, and a list of the available widget areas.
Once again, expand the GK Tabs I widget area and drag a new instance of News Show Pro to it, putting this one underneath the Most Commented section. Once the options are expanded, configure the widget accordingly. Like before, screenshots of the demo configuration for each option tab in the widget are added below, along with written details as to which options need to be changed from the default setting.
The Basic Settings Tab
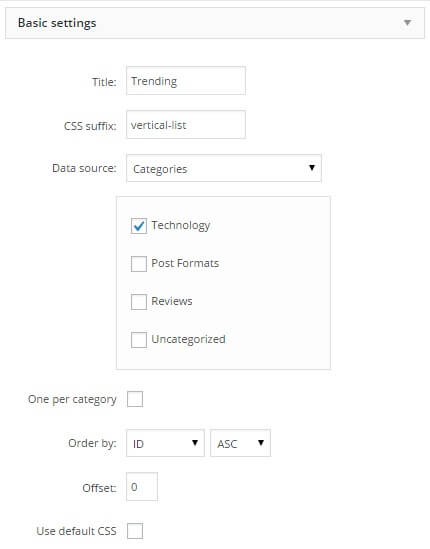
- Set the Title to "Trending".
-
Add the following text to the CSS Suffix field:
vertical-list - Change the Data Source option to Categories and add a checkmark to the Technology category in the list.
- Uncheck the Use default CSS option.
- Change the second drop-down list option in the Order by setting to ASC.
The Widget Layout Tab
- Set the Rows option to 4.
The Autoanimation Tab
No changes are required for this tab.
The Article Layout Tab

- Set the Article format option to technews-comments.format.
- Using draq & drop, put the elements in the following order; Image, Title, Text, Info Block (see screenshot for the order items should be in when finished).
- Set image size to 120x80.
- Uncheck the Image Popup option.
- Set the image's Position setting to Left.
- Uncheck the Show Text option.
-
In the Show Info Block area, set the Format option to:
by {AUTHOR} - Uncheck the Show Read More option.
The Link Format Tab
No changes are required for this tab.
The Advanced Settings Tab
No changes are required for this tab.
All options are now set, so click on the Save button at the bottom of the widget to save changes.
The Tabs Layout
We've created the listing content that will appear in the tabs; now we need to create the tabs themselves using the GK Tabs widget, which will then display the News Show Pro listings. To do so, open your WordPress Customizer by clicking on Appearance → Customize in the WordPress dashboard. Once it opens, click on the Widgets section to view a list of the available widget areas:
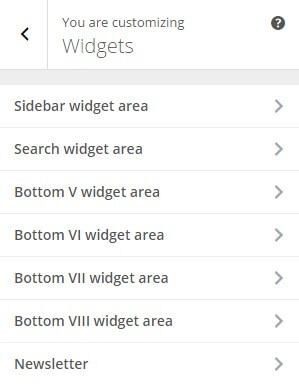
Now click on the Bottom V widget area to open the list of widgets currently assigned to this section (it should be blank since we've only just installed the theme!). Hit the Add a Widget button to open a list of available widget types, and select a Tabs by GavickPro widget from the list; a new instance of the widget will be created and the options expanded. Configuring this section is very easy as there are only two options that need to be changed from the default.
Simply change the Style option to None, and set the Tabs source option to GK Tabs I, where we stored our instances of News Show Pro earlier. That takes care of the main options, but there is one more thing that needs to be done; we must change the Widget Rules settings to ensure the widget only appears on the frontpage. Click on the Widget Rules button at the bottom of the widget settings to expand the options:
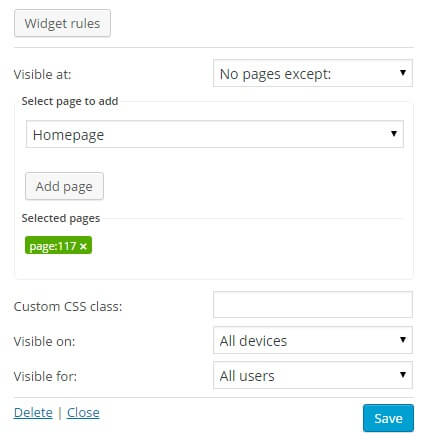
Set the Visible at option to No Pages Except; a new Select Page to Add drop-down list will appear where you can set which pages to show the widget on. Select Page from the list, and another option will appear where you can enter the page ID, title or slug that the widget should appear on. Enter 117 in this field and click the Add Page button to assign it; this is the ID of the base frontpage included in the demo content, and this will ensure the widget appears on the frontpage only. The widget rules are now set, so click the Save & Publish button at the top of the screen to save changes. Now if you check your frontpage you will see that the listed content is displayed in two separate tabs.
The Most Rated Listing
Next to the tabs containing the Most Commented and Trending listings is a third, similar listing displaying the Most Rated articles, but this time including animated review scores:

Like the other listings this section is created using an instance of News Show Pro. To setup this section, Open your WordPress Customizer and click on the Widgets section to see a list of widget areas, and expand the Bottom V area. Now click on Add a New Widget, and select News Show Pro by GavickPro from the list to create a new instance of the widget. Now we need to configure the settings; as before we'll go through each tab of options one-by-one, providing screenshots of the demo settings and details of what options need to be changed from the default as needed.
The Basic Settings Tab
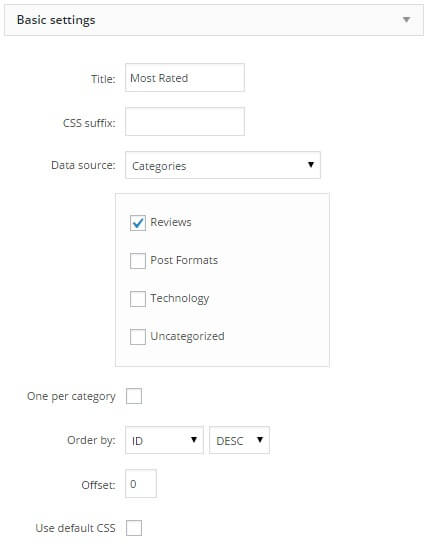
- Set the Title to "Most Rated".
- Change the Data Source option to Categories and add a checkmark to the Reviews category in the list.
- Uncheck the Use default CSS option.
The Widget Layout Tab
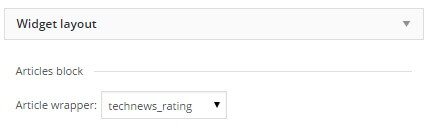
- Set the Article Wrapper option to technews_rating.
The TechNews Reviews Options Tab
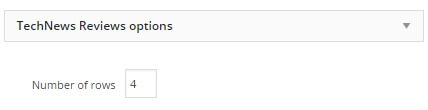
Set the Number of rows to 4.
The Article Layout Tab
No changes are required in this section.
The Advanced Settings Tab
No changes are required for this section.
Widget Rules
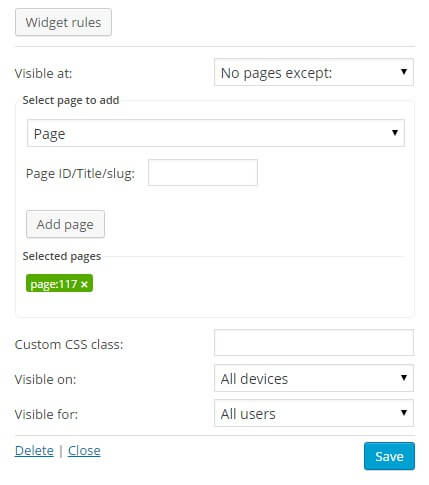
- Set the Visible at option to No Pages Except
- Add page 117 to the Selected Pages option.
That's all the options set, so click the Save & Publish button at the top of the screen to save changes, and this section is ready.
The Large Advertising Banner
This section appears next to the article listings, and is a simple advertising placeholder ready to be modified with your own banners:

To create this section, open the Widgets section of the WordPress Customizer and expand the Bottom V position once more; you should already have the Tabs and News Show Pro widgets. Click to add a new widget, but this time choose a plain Text widget.
Once done, copy the following HTML code and paste it into the Content field of the text widget:
<img class="pull-right" src="/[pageurl]/wp-content/themes/TechNews/images/demo/banner-2.jpg" alt="Banner -sidebar">
In the Widget Rules section, set the Visible at option to No Pages Except, and add page 117 to the Selected Pages. Finally, add the following text to the Custom CSS Class field:
clear gray-bg
The text widget is now ready, so click the Save & Publish button to save changes.
The Bottom Banner Advertisement
This widget displays another banner advertisement, this time at the bottom of the frontpage above the footer:

To create this section, open the Widgets section of the WordPress Customizer as before, but this time click on the Bottom VI widget area. Click to Add a New Widget and select a Text widget from the list. Now copy and paste the following HTML code into the Content field of the text widget:
<a href="#"><img src="/[pageurl]/wp-content/themes/TechNews/images/demo/banner.jpg" alt="Banner-bottom"></a>
Now click on the Widget Rules button to expand the options. Set the Visible at option to No Pages Except, and add page 117 to the list of Selected Pages. Next, add the following text to the Custom CSS Class field:
banner
The widget is now ready, so click the Save & Publish button to save changes.
The frontpage widgets are now all complete, and your frontpage should match the demo layout. Now we need to assign menus in the theme and configure any additional widgets.
Assigning the Menus
TechNews includes three menu areas; the main menu at the top of the page, a footer menu at the bottom, and a footer popup menu that includes a link to jump back to the top of the page or login. The demo content we imported earlier included example menus so we don't need to spend time creating new ones, but we do need to assign the menus to their respective positions.
To do so, open your WordPress Customizer and click on the Menus option to see a list of menus; you should see a list of three available menus called Footer Menu, Footer Popup Menu and Main Menu, so it's pretty easy to guess which goes where! To assign these menus, click on the Menu Locations button above the menus; you will be taken to a list of the menu locations with drop-down lists where you can set which menu appears in each location.
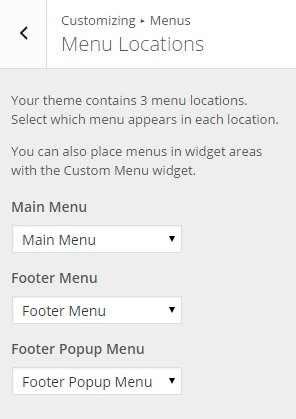
Simply assign each menu to their namesake menu position; the Footer Menu should be assigned to the Footer Menu position etc...
Once finished click the Save & Publish button to save the changes, and your menus are configured! Finally, there's one more step; the additional widgets need to be configured.
Additional Widgets
As well as the main frontpage widgets, TechNews also includes several additional widgets that appear throughout the theme, such as in the sidebar area on post and review pages, or the newsletter pop-up that appears on all pages by default. As such, they only need to be added if you wish to make use of their respective functionalities. In this section we'll cover how to install and configure these widgets.
The Newsletter Widget
This widget creates the popup newsletter sign-up form:

This section is created using a MailPoet Subscription Form, so in order to create this section we'll need to perform two steps; first, create a form template in MailPoet, and second, display this form in the relevant section via a widget.
Creating the Newsletter Form
To create the newsletter form's layout, in your WordPress backend click on MailPoet → Settings to go to the options page, then click on the Forms tab; you'll see a list available forms; we'll start afresh so click on the Create a new form button at the top of the section.
In the Edit New Form page, you'll see the elements to create your own form. The main field on the left displays the form, and on the right is a set of different form elements that you can drag and drop onto the main field to create the form bit by bit.
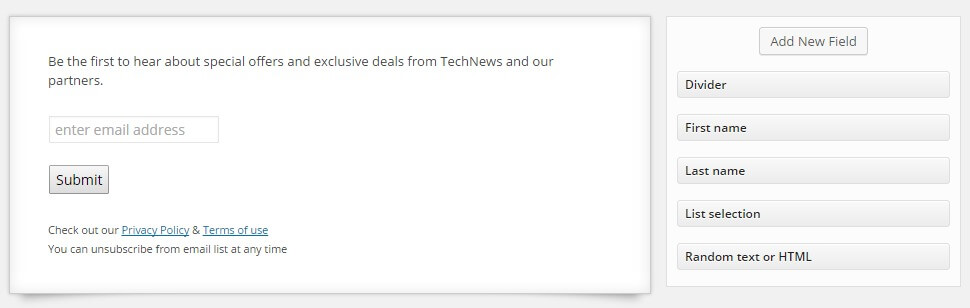
The form has two elements already added; an Email field, and a Subscribe button. We'll start by modifying these elements to match the demo. Mouse over the email field in the main left area; an Edit Field button will appear. Click on this button to open a popup where you can modify the element.
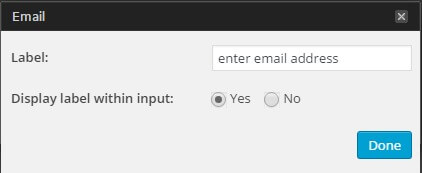
Change the Label field's text to:
Enter email address
And change the Display Label in Input option to Yes, then click the Done button to save changes. Now hover over the Submit button and click the Edit Display button. In the settings popup, change the Label field to:
Submit
And click Done. Now we need to add the additional areas. Click and drag a Random text or HTML field from the right of the screen to the form; the form will expand to display areas where you can place the element. Drop the text element above the email field, then hover over it and click on the Edit Display button. In the popup that opens, remove the placeholder text and copy and paste the following HTML in its place:
<p>Be the first to hear about special offers and exclusive<br> deals from TechNews and our partners. </p>
And click Done to close the popup. Now drag another Random text or HTML element and drop it under the Submit button, then open the Edit Display popup for this new element and replace the placeholder content with this HTML:
<small>
Check out our <a href="#">Privacy Policy</a> & <a href="#">Terms of use</a><br>
You can unsubscribe from email list at any time
</small>
Click the Done button to close the popup. Finally, add a name for your form in the Edit Name field at the top of the page and click the Save button at the bottom of the page to save the new form. We can now create the widget for this form.
The Newsletter Widget
To create the popup that will display the form we just created, we'll use one of MailPoet's pre-prepared widgets. Open the WordPress Customizer by clicking on Appearance → Customize and open the Widgets section, where you'll see the list of available widget areas.
The newsletter has its own pre-prepared widget area called Newsletter, so click on this to expand the area; there shouldn't be any widgets already loaded here, so click the Add a Widget button at the bottom of the expanded area.
A second sidebar of options will open with a list of available widgets to choose from. In this list, choose the MailPoet Subscription Form. The options for the widget will appear:
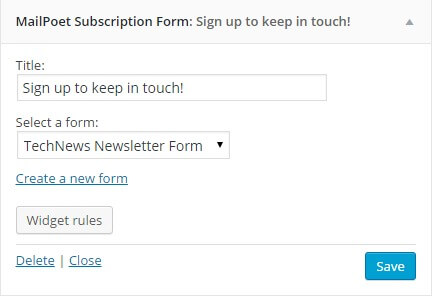
In the Title field add the following text:
Sign up to keep in touch!
And in the Select a form list make sure the form you made in the previous section is selected. Once added click the Close button to collapse the options and hit Save & Publish to save changes. The newsletter section is now sorted!
The Sidebar Advertisement
This widget creates a simple square advertising banner placeholder that appears at the top of the sidebar on post pages:

To create this section, in the Widgets section of the WordPress Customizer, open the Top Sidebar Widget Area and click the Add a New Widget button. Select a Text widget from the list. Once the widget is created, type "Advertisement" in the Title field, then copy the following HTML code into the Content field of the text widget:
<img src="/[pageurl]/wp-content/themes/TechNews/images/demo/banner_300.jpg" alt="Banner 300px">
Next, click on the Widget Rules button to expand the options. Set the Visible at option to All pages except, and then add the following pages as exceptions in the Selected Pages section (do this by selecting Page from the Select page to add drop-down list, adding the listed text to the Page ID/Title/Slug field and clicking Add Page):
- widget-styles
- contact
- typography
- 404
These pages are all included as part of the demo content, so if you don't intend to make use of these pages then adding these exceptions can be skipped. Now, add the following text to the Custom CSS Class field:
advertisement
And click Save & Publish to save changes; the widget is now ready.
The Sidebar Article Previews
This section displays a list of popular articles in the sidebar, providing another way to promote your content to readers:
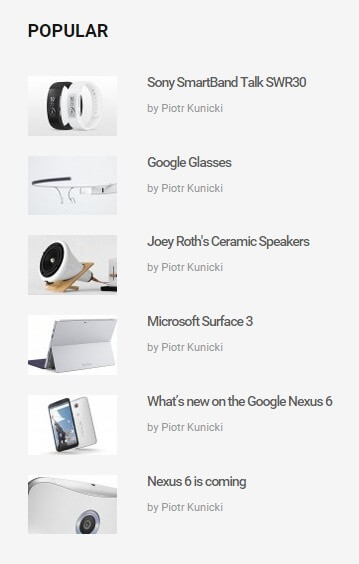
This section is based on an instance of our News Show Pro widget, just like the frontpage article listings. To create this section:
Open the Widgets section of the WordPress Customizer and click on the Sidebar Widget area, then add a new News Show Pro by GavickPro widget instance to this area. Now we'll need to configure the options as follows:
The Basic Settings Tab
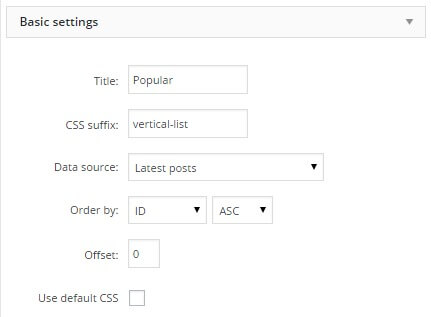
- Set the Title to "Popular".
-
Add the following text to the CSS Suffix field:
vertical-list - Uncheck the Use default CSS option.
- Change the second drop-down list option in the Order by setting to ASC.
The Widget Layout Tab
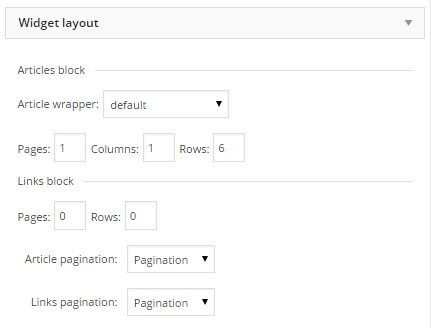
- Set the Rows option to 6.
The Autoanimation Tab
No changes are required for this tab.
The Article Layout Tab

- Set the Article format option to technews-vertical.format.
- Using drag & drop, put the elements in the following order; Image, Title, Text, Info Block (see screenshot for the order items should be in when finished).
- Set image size to 90x60.
- Uncheck the Image Popup option.
- Set the image's Position setting to Left.
- Uncheck the Show Text option.
-
In the Show Info Block area, set the Format option to:
{AUTHOR} - Uncheck the Show Read More option.
The Link Format Tab
No changes are required for this tab.
The Advanced Settings Tab
No changes are required for this tab.
Widget Rules
Expand the Widget Rules options and set the Visible at option to All pages except, then add the following pages to the Selected pages list:
- widget-styles
- contact
- typography
- 404
As before, these pages are included as part of the demo content, so if you don't intend to use them then this step can be skipped.
All options are now set, so click on the Save & Publish button to save changes.
The Search Bar
The search bar is a simple search widget in the menu area of the theme:
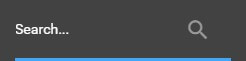
To create this widget, expand the Search widget area in the Widgets section of your WordPress Customizer, and add a new widget. In the list of available widget types, choose the Search widget. No custom options need to be set here, so once the widget is loaded click the Save & Publish button to save changes and your search bar is ready.
Finished? Then your theme should now match the demo layout, and you can get started with customizing it to your heart's content!