WordPress Quickstart Installation: Match our theme demo with all widgets, plugins and example content
An installation of the WordPress Quickstart package is a really simple process. First of all, you’ll want to download the correct package that contains the required files. Please, head to our download section and select your preferred theme – you should see the following page with a few packages available to download:
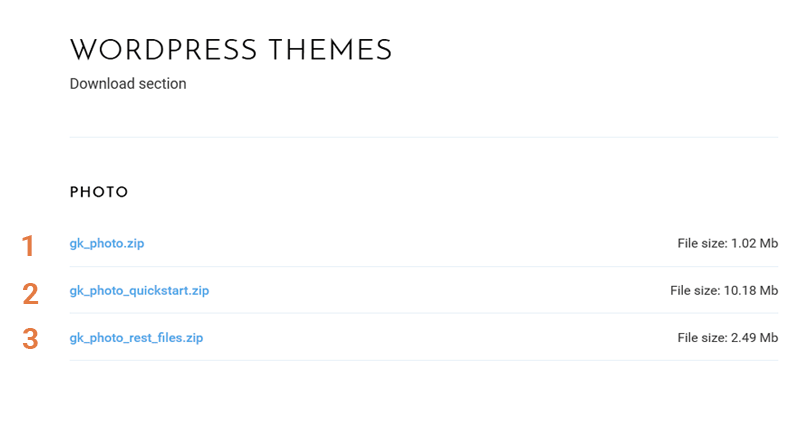
In the above case, we have marked three theme packages:
- theme package – contains only the theme files and should be used on existing WordPress pages.
- quickstart package – contains a complete WordPress installation with the demo content – we will describe the whole installation process in this article.
- rest_files package – contains the template source PSD files (it may also contain other necessary files).
Click on the link for the Quickstart package and wait for the files to be downloaded. Then, unpack the downloaded ZIP package.
Now, you have a folder filled with all the files you need to install WordPress along with our theme and demo content. Upload all the files and folders inside the extracted quickstart folder to your preferred install location on your host’s server via FTP; this could be the server root, or to a subdirectory if WordPress is not intended to be the main frontpage of your site. If you are developing the site locally, then you can move the files directly to your localhost’s directory.
Once you’ve moved/uploaded all the files, you should open your browser and navigate to the same location on your website i.e. if you uploaded the quickstart files to the server root, then you’d need to open your main website address – in our case, we moved the directory content to the wp_qi directory on our localhost server, so we’ll open: http://127.0.0.1:8080/wp_qi. After pointing your browser to where you uploaded the quickstart files, you should see the following message:
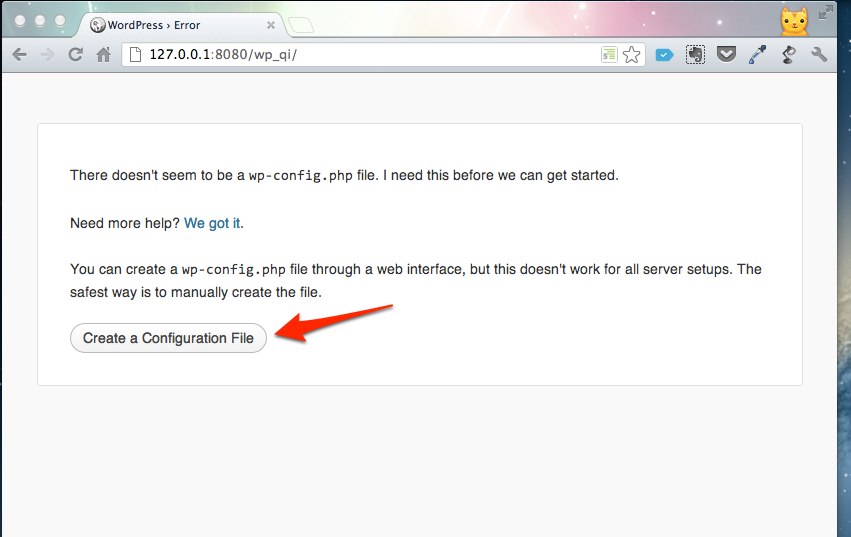
This means that the wp-config.php file doesn’t exist and you should configure it – just click the button – the browser will navigate to the first step of the installation process:
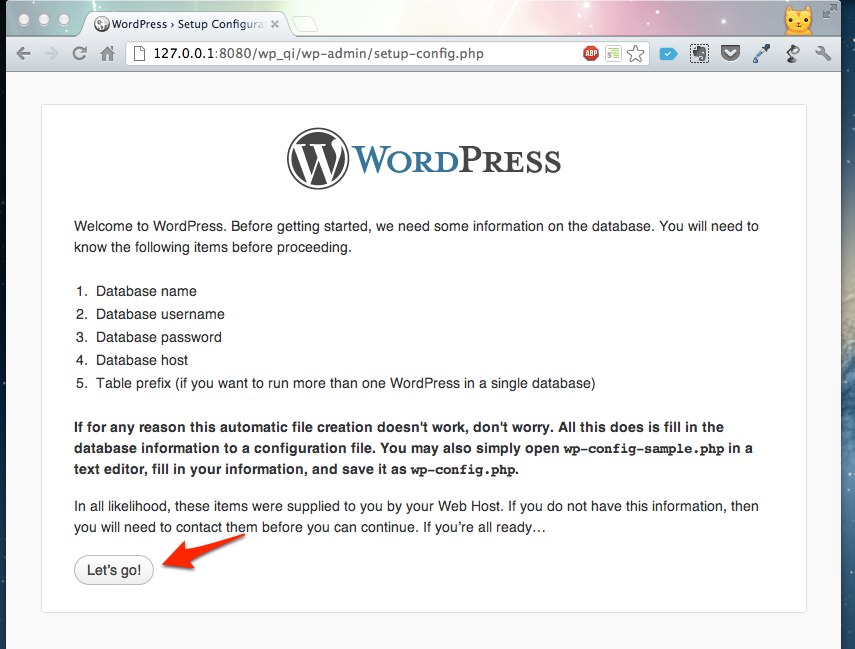
As you can read on this page, you need to create or already have a database to install the WordPress quick start pack, as well as the database name and password. You will be able to create the database via your hosting area. When you have a database for your WordPress installation, you can go to the next step by clicking the “Let’s go!” button:
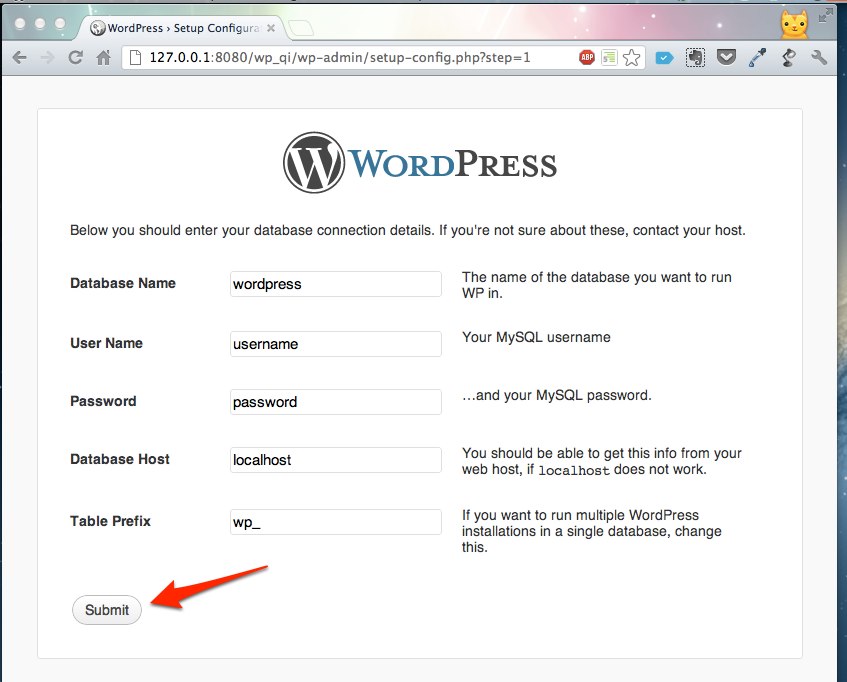
WordPress will ask for the database name, user, password, host and the table prefix – you need to fill this information in and then you can submit the form.
If all the database access data is correct then you should see following screen:
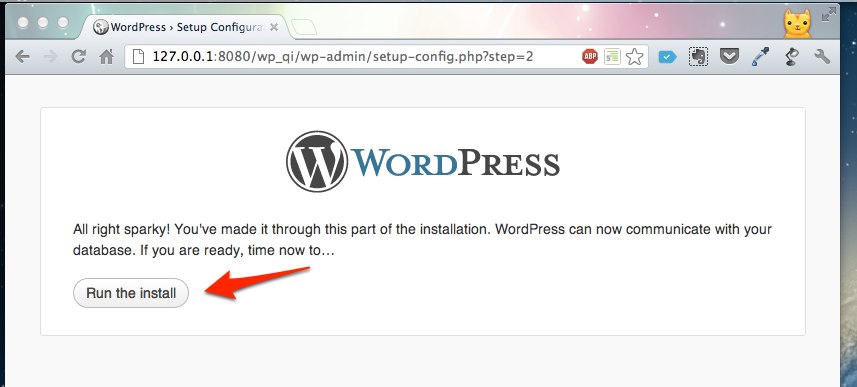
If all the database access data is correct you can run the installation – just click the button. You will see the last form that requires input:
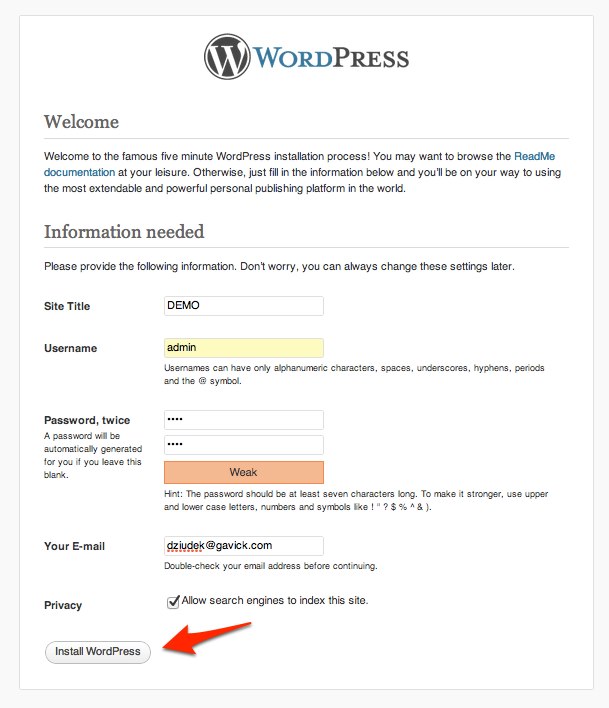
You have to specify the installation name, an administrator username (WARNING: you cannot change the administrator username after the installation), administrator password and e-mail. Additionally, you can specify if the page is visible to search engines.
If all form data is filled, you can click the “Install WordPress” button. When the installation process finishes you will see the following screen:
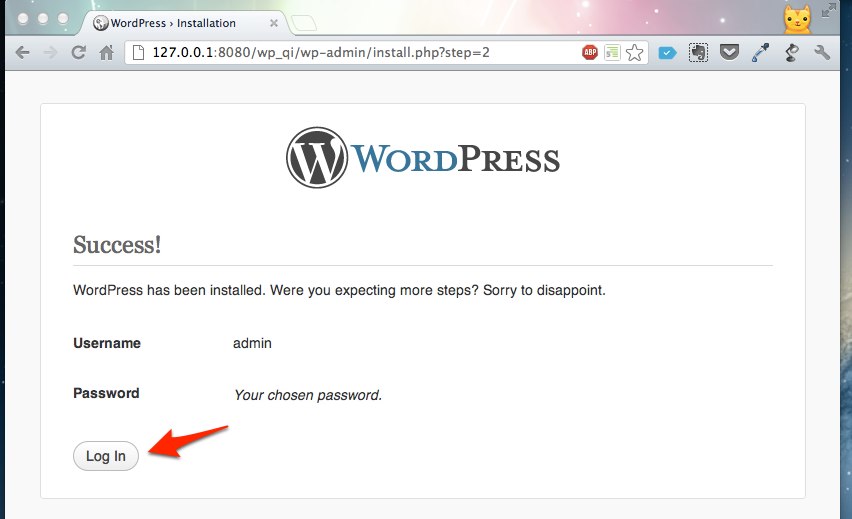
Now, you can login to your new page back-end (click the “Log In” button):

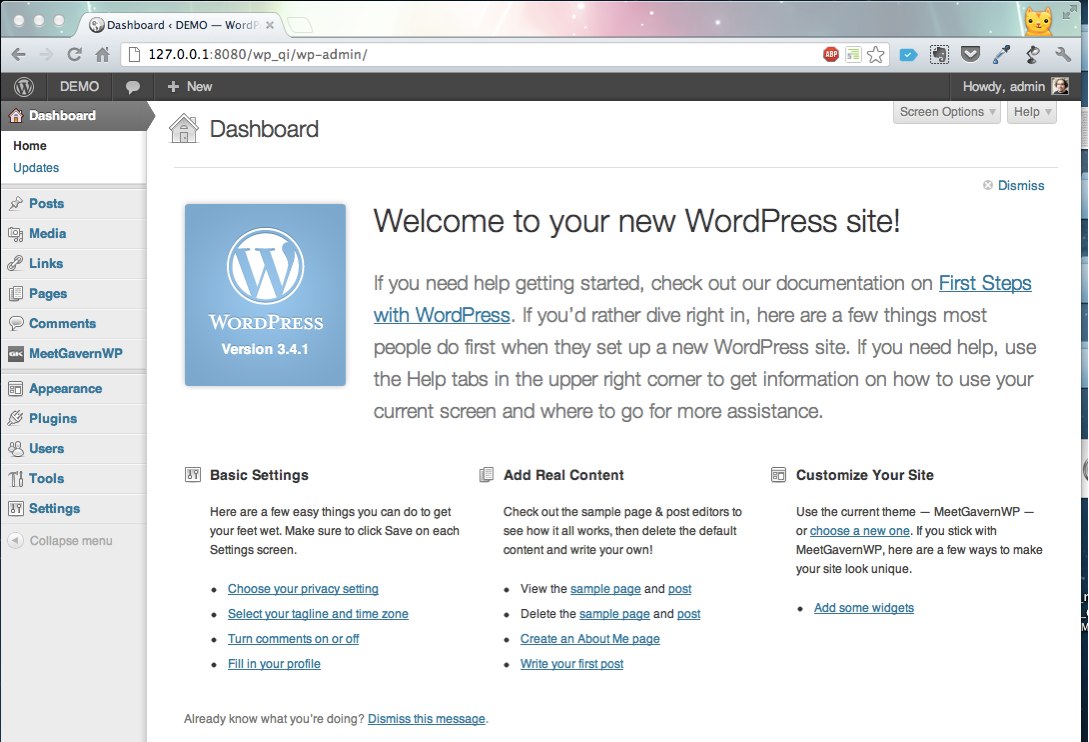
You have to use the user data from the previously-filled form – after the log-in process, you should see the WordPress back-end with the Welcome Screen:
When you go to the website, you will see the theme with the demo content:
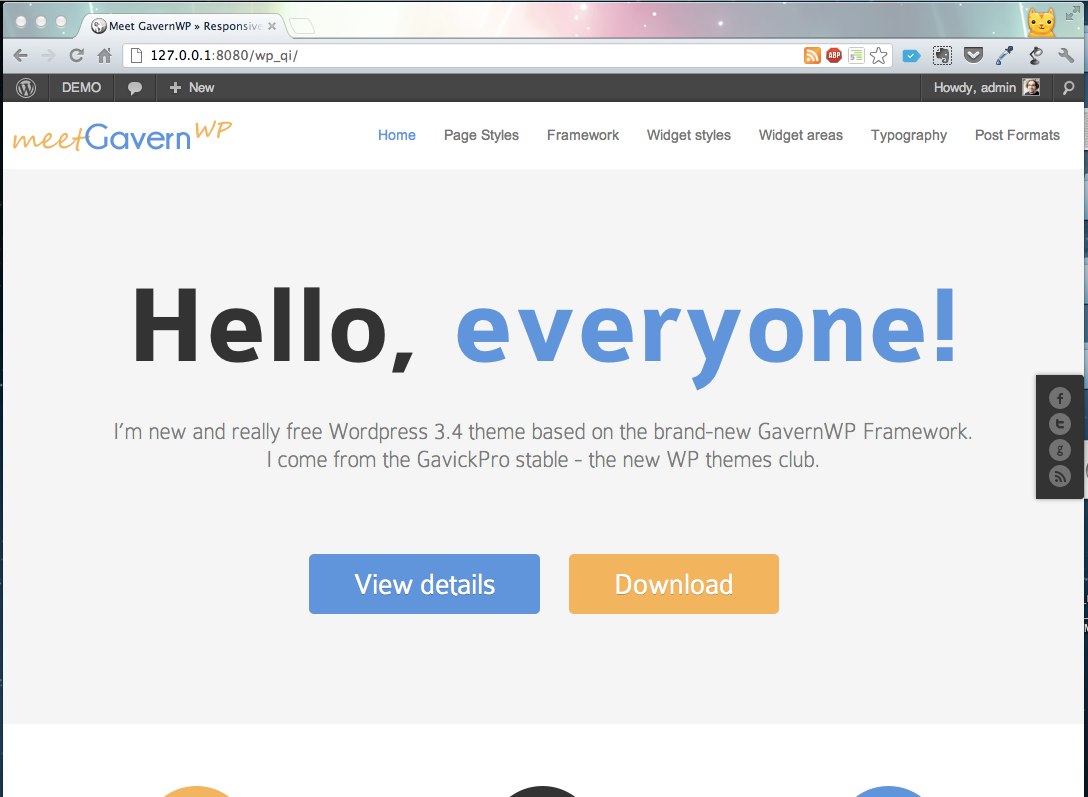
If the demo content is identical to the page on our demo site, it means that everything has been done correctly and you can enjoy your fresh WordPress installation!
This article was first published
